


Running Ollama on Google Colab with Tailscale
Running Ollama on Google Colab
I wanted to try the TCM Security AI Hacking 101 Lab, but my local machine wasn’t powerful enough to run a 7B parameter model comfortably. Instead of upgrading my hardware or paying for a GPU server, I decided to use Google Colab to handle the model.
The idea is to run Ollama inside a Colab GPU runtime and connect to it remotely using Tailscale. This lets me use the model from my own machine while the actual inference runs on the Colab GPU.
The setup looks like this:
flowchart LR
    A[Local Machine] -->|Tailscale| B[Google Colab]
    B --> C[Ollama]
    C --> D[LLM]
    B --> E[GPU]

    D --> E
Deploying to Google Colab
The easiest way to get started is to open the notebook directly in Google Colab.
Before running the notebook, there is one thing you need to configure: a Tailscale authentication key.
Creating a Tailscale Authentication Key
The notebook uses Tailscale to connect the Colab runtime to your tailnet. To do that, create an auth key from the Tailscale admin console.
Go to Tailscale → Settings → Keys and create a new authentication key.
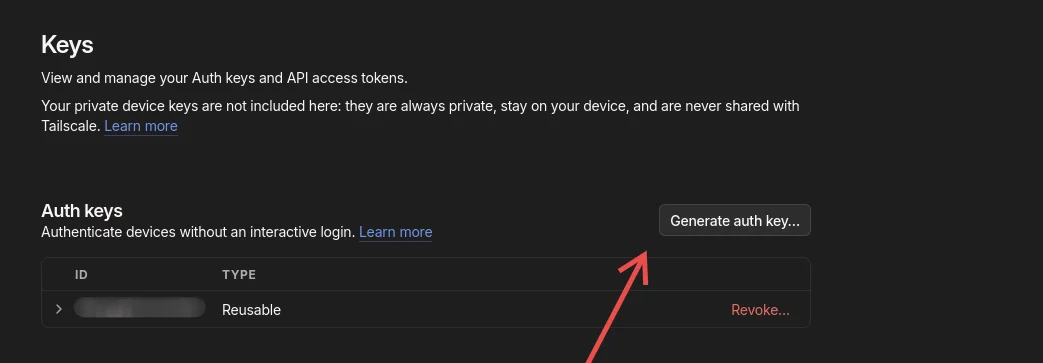
You don’t need to put the key directly inside the notebook. In fact, you shouldn’t. We’ll store it in Colab’s Secrets instead.
Adding the Key to Colab
After opening the notebook, open the Secrets panel in Google Colab and add a new secret:
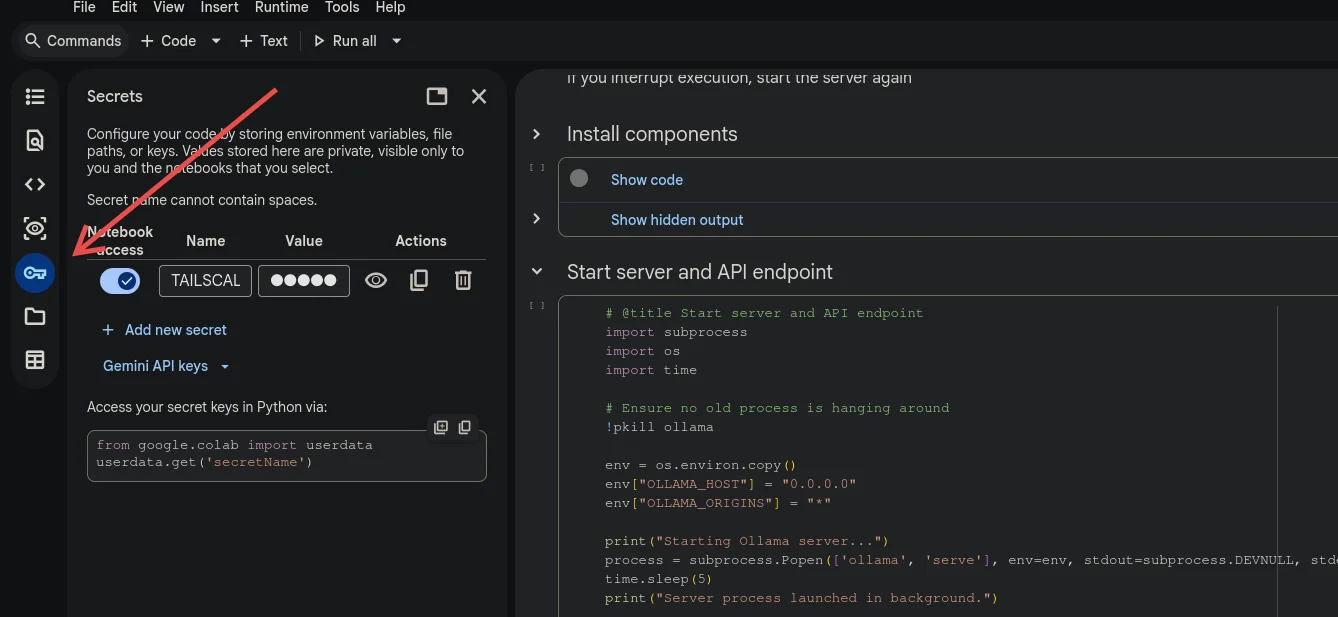
Name: TAILSCALE_AUTHKEY
Value: <your Tailscale auth key>
Running the Instances
Once the Colab notebook is deployed, the next step is to connect to a GPU runtime.
In Colab, click Runtime → Change runtime type and select a GPU. The exact GPU you get depends on what is available for your account at the time.
After connecting to the runtime, run the notebook cells from top to bottom. The notebook will install Ollama, configure the GPU, connect the instance to Tailscale, and start the Ollama server.
Once everything is running, the notebook will show the Tailscale IP address of the Colab instance. This is the address you can use from your local machine to access Ollama.
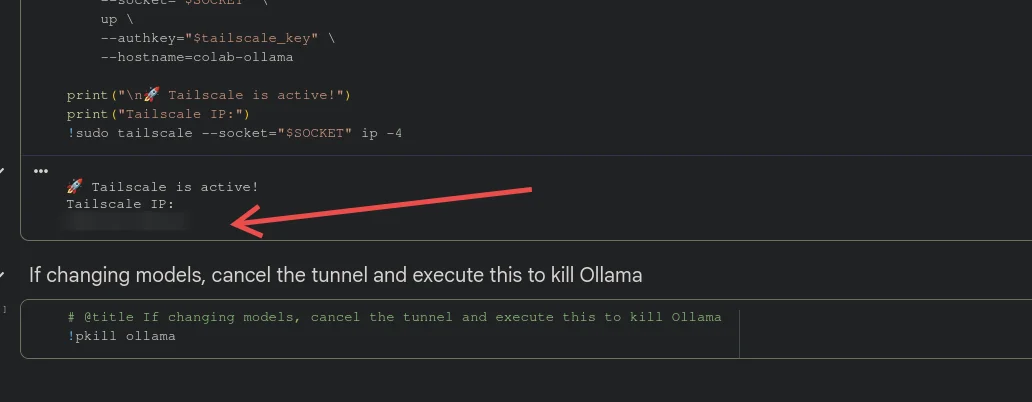
example:
http://100.x.x.x:11434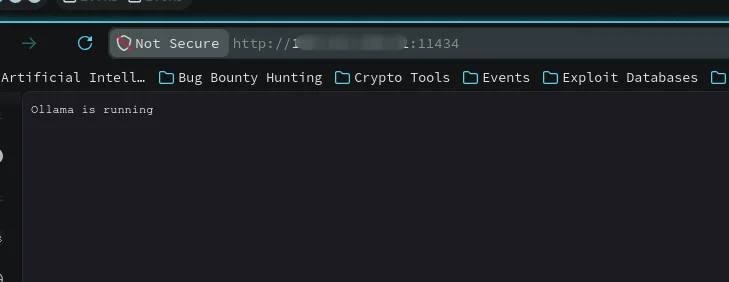
Stop the Colab session when you’re done.
Google Colab’s free GPU usage is limited. Leaving the runtime running when you’re not using it can waste your available usage.
When you’re finished, go to Runtime → Disconnect and delete runtime to release the GPU.
Connecting With TCM Security AI Hacking 101 Lab
Now that Ollama is running on Colab and connected through Tailscale, we can use it with the TCM Security AI Hacking 101 Lab.
Open the lab and select the Cloud hardware option. For the connection method, select Tailscale.
Next, enter the Tailscale IP address shown in the Colab notebook. Ollama uses port 11434, so the address should look like:
http://100.x.x.x:11434After that, select the same model that you downloaded and started in the Colab instance.
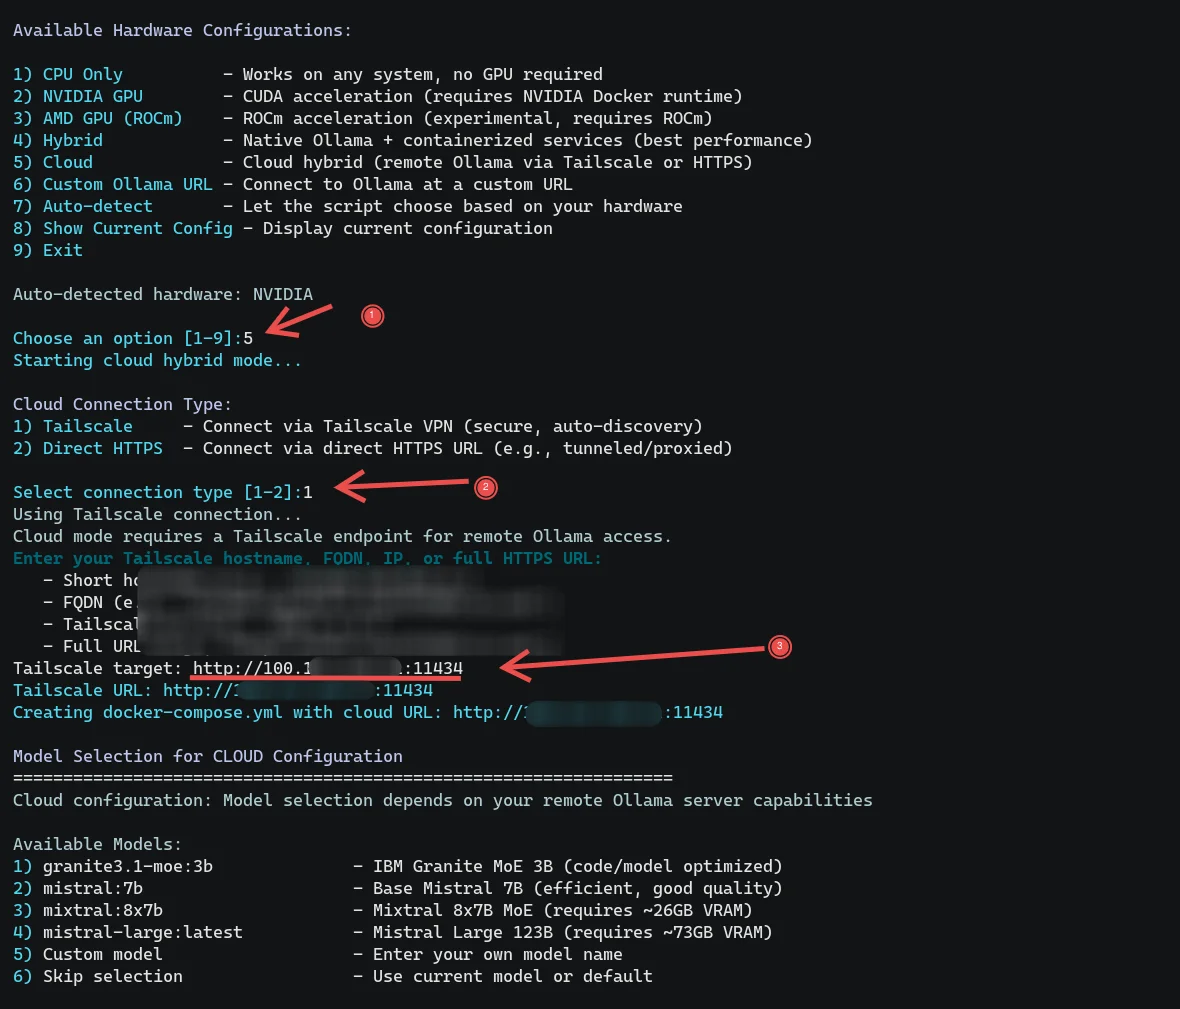
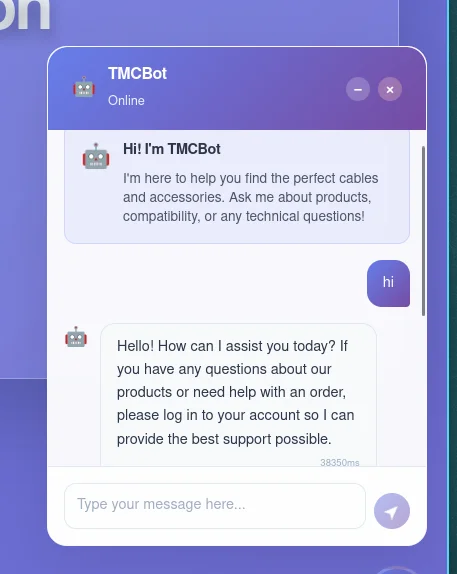
Once everything is configured, start the lab and open the chatbot. If the connection is working correctly, the lab will send the requests through Tailscale to the Ollama instance running on Google Colab.
This means the TCM lab is running on my local machine, while the actual LLM inference is being handled by the Colab GPU.
References
- Ollama Colab Runner — The Colab notebook used to run Ollama with GPU support.
- Tailscale Documentation — Official documentation for Tailscale.
- Tailscale CLI Reference — Documentation for commands such as
tailscale upandtailscale ip. - Tailscale Identity — Explains how Tailscale identifies devices and nodes.
- Setting up a Server on Tailscale — Guide for connecting servers to a tailnet using authentication keys.